What I want to share today is how to implement Ansible Automation Lab on KVM (Kernel Based Virtual Machine).
It can also be implemented on VirtualBox, VMWare Workstation. Procedures are the same.
Ansible Automation Lab Minimum Hardware Requirements a
- 1GB RAM & 40GB HDD for control node
- 512MB RAM & 20GB HDD for Managed node
I use RHEL 8 (Ootpa) for Linux VM
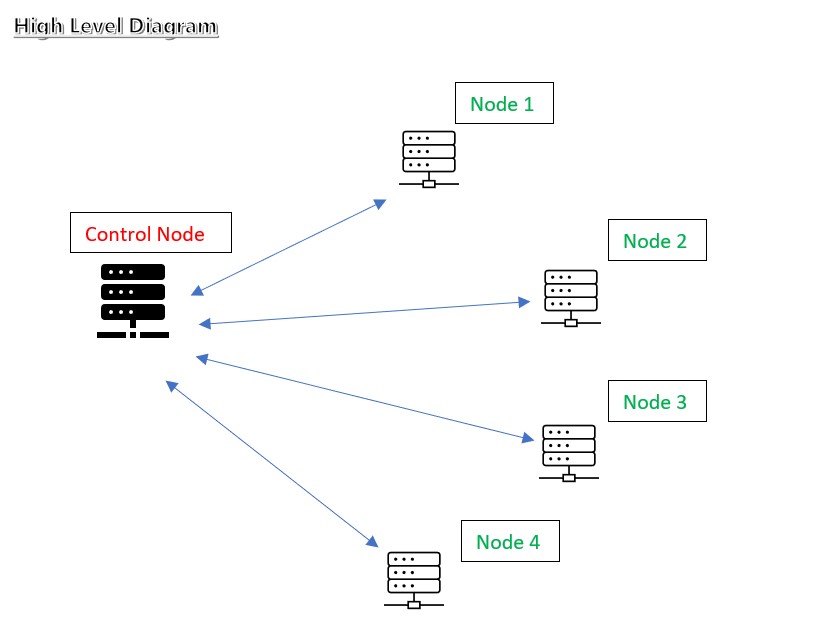
For the Lab
Control Node = 1 VM
Managed Node = 4 VM (2VM or 1VM up to you)
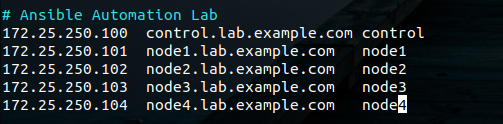
> vim / etc / hosts
First, mark the FQDN and IP in our Host VM / etc / hosts file.
** We will first create a Local Repo on the Control Node
** Prerequisite **
- Red Hat Developer Subscription
- https://developers.redhat.com
- RHEL 8 DVD ISO
** We must first register the control node vm RHEL Developer Subscription
- root@control.lab.example.com # subscription-manager register
- root@control.lab.example.com # subscription-manager repos –enable = rhel-8-server-ansible-2-rpms
- root@control.lab.example.com # yum install ansible
** If you can’t install with yum, you can install with pip
- root@control.lab.example.com # pip install ansible == 2.8.0
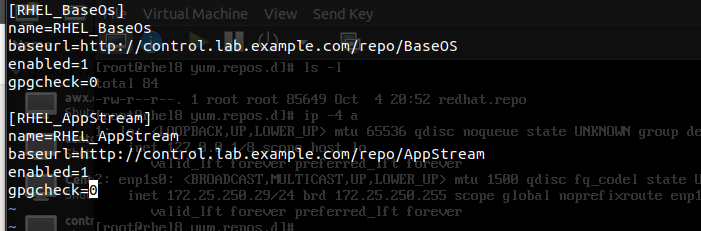
# First create a local repo using the apache server on the control node
- root@control.lab.example.com # yum repolist & yum update -y
- root@control.lab.example.com # yum install httpd
- root@control.lab.example.com # mkdir /tmp/repo
- root@control.lab.example.com # mount -t iso9660 /dev/sr0 /tmp/repo
- root@control.lab.example.com # mkdir -p /var/www/html/repo
- root@control.lab.example.com # cp -avr /tmp/repo/* /var/www/html/repo
** Create a local.repo file at #etc/yum.repos.d/
- root@control.lab.example.com # rm -rf /etc/httpd/conf.d/welcome.conf
- root@control.lab.example.com # vi /etc/httpd/conf/httpd.conf
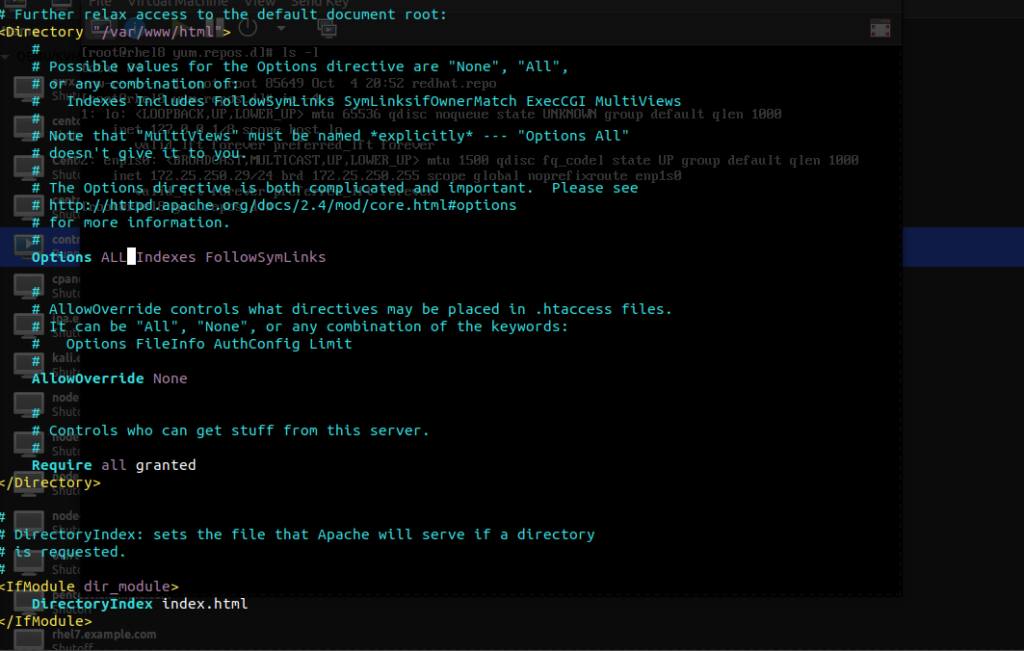
** Enter ALL after Options **
- root@control.lab.example.com # systemctl restart httpd.service
- root@control.lab.example.com # yum repolist -v
** If you no longer need the RHEL Developer Subscription
- root@control.lab.example.com # subscription-manager unregister
- root@control.lab.example.com # yum repolist -v
** Copy local.repo on managed node vm using scp
- root@control.lab.example.com # for i in node {1..4}; do scp /etc/yum.repos.d/local.repo root @ $ i.lab.example.com: /etc/yum.repos.d/
** http port must be opened on control node vm
- root@control.lab.example.com # firewall-cmd –permanent –add-service = http && firewall-cmd –reload
- root@control.lab.example.com # firewall-cmd –list-all
** In managed node vm
- root@node1.lab.example.com # yum clean all && yum repolist -v
** Now the http local repo creation part is done
** Ansible Lab **
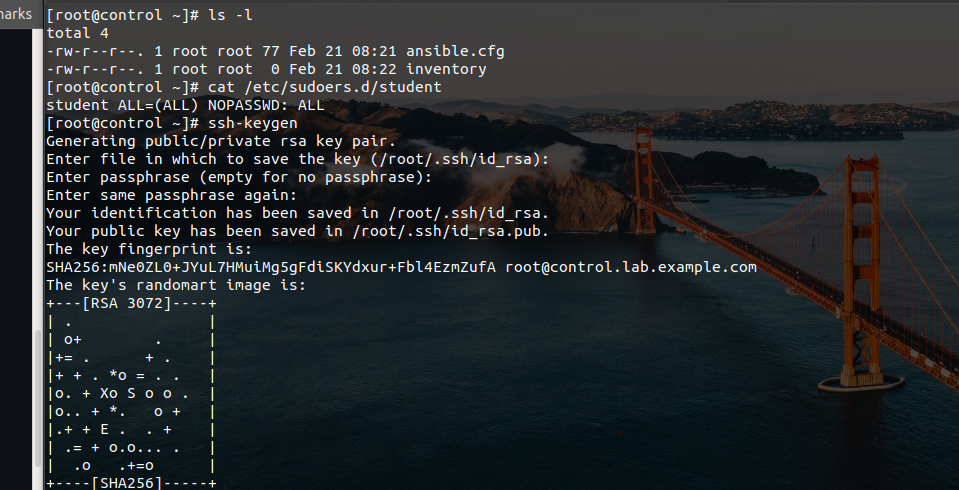
- For ansible lab, you must first create a ssh-keygen and sudoers file for student user

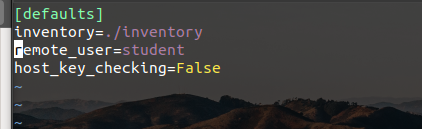
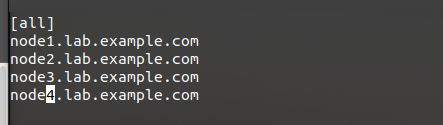
** You must create an ansible config file & inventory file **
- root@control.lab.example.com # mkdir ansible_lab
- root@control.lab.example.com # vim ansible.cfg
root@control.lab.example.com # vim inventory
** ansible lab testing (localhost) **
- root@control.lab.example.com # ansible localhost -m ping -c local ”
- root@control.lab.example.com # ansible-playbook main.yml -c local -i “localhost,”
** ansible lab testing managed hosts (remote) **
- root@control.lab.example.com # ansible all -m ping
- root@control.lab.example.com # ansible-playbook main.yml
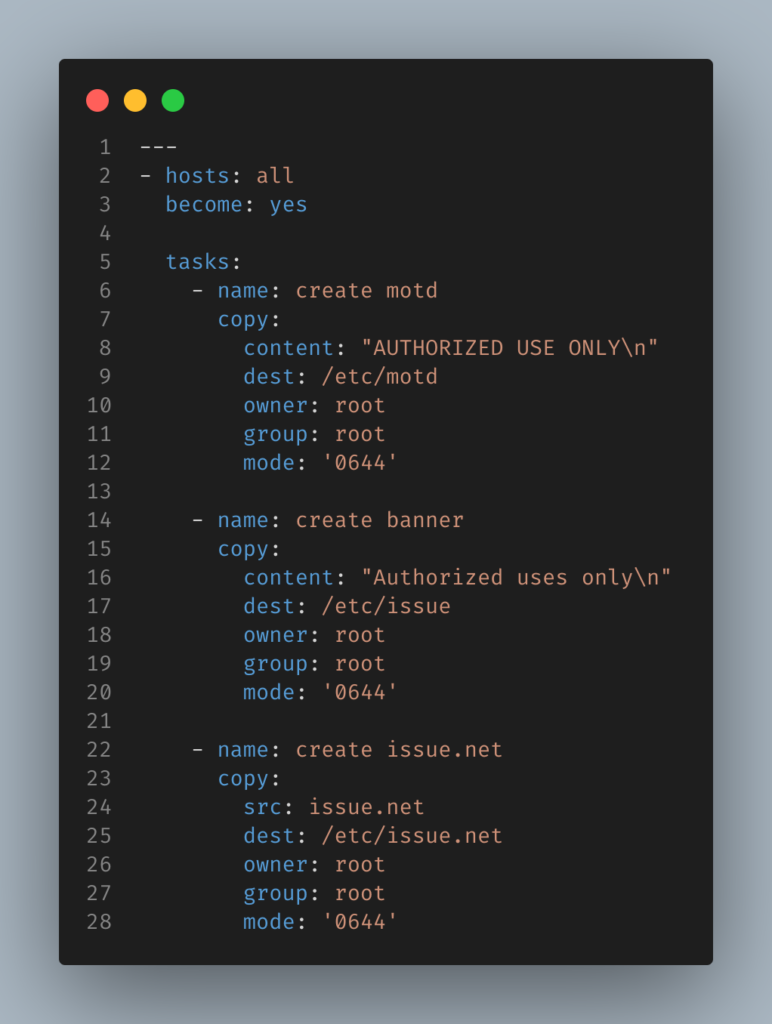
** Example Ansible Playbook **
** Ansible playbook use cases can be found at the following github links **
** Thanks For Your Time Mate ^. ^ **